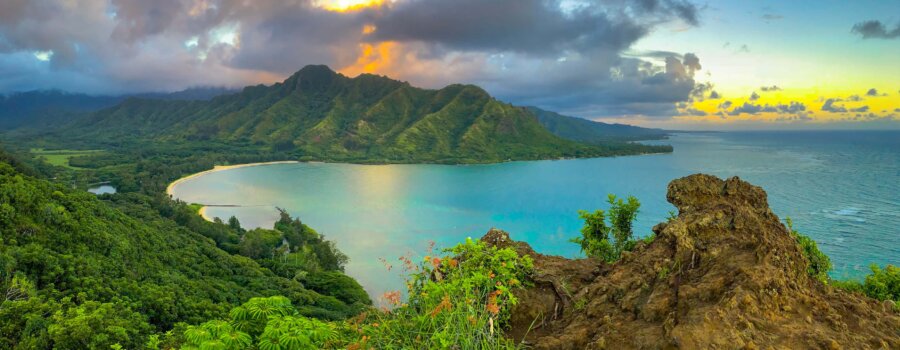
Crouching Lion hike was one of the more memorable activities that we did in Hawaii and it was unexpected as well. This is an illegal hike but the end result is worth it! You will climb up to a very high elevation with a breathtaking view over Kahana Bay.

Contents
Hours
Since this hike is illegal, there are no opening and closing hours. Just be mindful of the neighborhood and don’t make too much noise as you are trying to find the entrance to the trail.
Directions
You can navigate to this address 52-204 Kamehameha Hwy, Kaneohe, HI 96744. However, the actual entrance to the trail is a little more tricky to find.
Admission
Admission is free!
Parking
There is some parking at the entrance to the trail. We actually didn’t start the hike at this entrance because we couldn’t find it due to poor instructions from another blogger. So we will clear this up for sure!
Another blogger mentioned to park at the nearby beach since it didn’t have any parking restrictions. So we parked at Swanzy Beach Park and walked over. The walk is 0.7 miles away from the “starting point” we thought. But to the real entrance, it’s 1 mile away by walking.
Restrooms
The restrooms are all around you (if you are daring enough). Otherwise, make sure to use the restroom before you head out to Crouching Lion hike. You can use the restroom at Swanzy Beach Park as well.
Distance
Apparently there are multiple ways to get to the top of Crouching Lion but we didn’t know this at the time.
There is a short but steep way (Normal Way), there is the longer (4 mile loop) way (Longer Way), and there is the way that we took (even steeper than the normal way). Let’s call the way we took the SUPER short cut.
The way we took is a path normally NO ONE TAKES. We can tell by all the spider webs our friend fought off.
Difficulty
This hike is hard and not for casual hikers – especially if you decide to take the Super Short cut. We were walking at almost a vertical climb up through bushes and trees in the dark (since we wanted to get to the top for sunrise). Tree branches became our friends to assure a safe passage up.
The hike back down was not much easier (although we did take the Normal Way for our hike back) – the ground was slippery and muddy. We had to use some ropes and branches along the way too.

Crouching Lion Hike
We decided to do the Crouching Lion hike after we failed to get into the trail for Stairway to Heaven. The cops were chasing us out haha. So we drove over here around 3AM or so and took a nap for 30 minutes in the car at Swanzy Beach Park. We started walking to the hiking entrance around 4AM in the pitch black.

On our walk to the entrance, we saw shooting stars over the ocean!
Finding The Entrance
We did do our research beforehand on how to find the entrance to the trail so we knew that we were looking for a telephone pole and a sign that said “Do Not Pass”. After parking at the beach and walking over, we went into an area called Makaua Village.

I blame Google Maps and this other blogger’s directions. They said to follow Google Maps to the trail head’s entrance. My Google Maps led us to an entrance inside this village. The Normal path’s entrance is on the side of the main road. NOT inside this community.
So we kept following the map and it led us deeper inside the community. We walked around for a few minutes before Brea thought she saw the entrance to the trail. There was a “Do Not Enter” sign and a somewhat clear path leading up the mountain. So sure! That’s probably the trail!
All I saw were bushes and trees that led into darkness, but our friend started leading us into this wary path.
The actual entrance was on the street side because we saw it on our hike back out.


The Hike Up
As soon as we started on the trail, the hike became steep quite immediately. If you are cold at first, don’t worry, you will definitely work up a sweat.
TIP: bring a flashlight or a headlamp. This really helped us do this sunrise hike. Headlamp is the best recommendation if you do the Super Shortcut path because you will be using your hands to climb.
This was when our friend mentioned that he was fighting off the spider webs (thankfully I didn’t feel any webs or spiders on me). If people hiked this path more often, you wouldn’t have to worry about them. If you also go this path, be prepared to get your clothes dirty and filled with these green moss like things.

We hiked up the steep hill for about 45 minutes before finally getting to level ground.
It was still dark once we got up. We looked at the other blogger’s guide for more information since we couldn’t tell if we were at the part we needed to be. They mentioned that we have to use rope to climb up to the spot we needed to get to. So far we haven’t climbed up any rope so we needed to keep going.
They mention this rock formation that is like a cave and on the side looks like a lion. When we reached the level ground, we were already at the cave. We walked around the cave area and saw a grave site and walked back into the cave. Our friend decided to scope the area further while we rested.

He found another pathway further past the cave. We walked just a little further out and found the rope that was mentioned. Some guides mention how unsafe it can feel having your life dangle on a small rope that you don’t know how long it has been there and how much abuse it has handled. As far as I know, any help is better than no help. But branches are better than rope tied to a branch. They’re better because they have roots that go down into the earth.
As you climb up this rope, you will be using it to help pull up your lower body. It is not a very steep vertical climb, just to help you get assistance since the footing is not stable.
At The Top
Once we finally got to the tippy top of the ridges overseeing the ocean, we finally took a break and watched sunrise over the horizon. We took tons of pictures! It was definitely something worth being proud of.


We spent a lot of time at the top and walked around to several different areas. Be careful around the edges though (especially in the dark).

You can tell that we really enjoyed the view at the top of Crouching Lion because we took pictures everywhere. At one point, Brea and our friend even climbed up this rock. Be careful if you try this too!


Another area we liked to take pictures was here. There is a small spot that you can sit on.


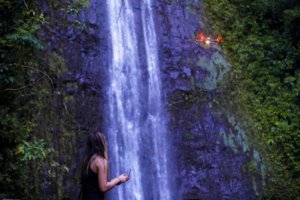
It can get windy at the top sometimes so that’s why Brea was a little hesitant to fly her drone. However, after some convincing she ended up flying it! It is definitely worth the risk.


During her flight, the wind was so bad that her drone looked very unsteady. You would have to put it in Sport mode.


Don’t forget to get this iconic photo with Kahana Bay in the background!


I really loved the green ridges!

There was another group of hikers who also came to the top but after the sunrise. They were the ones who told us that we took a really, really steep way that no one takes, and that the correct path way down was a different way.

The trail out is next to the grave site on the right hand side when you are looking at it. Please pay your respects as you pass by.

The hike down also had a couple areas for a nice photo.


Before going on our trip to Hawaii, we were both really looking forward to doing the Stairway to Heaven hike and was disappointed that we didn’t manage to get on to the trail. However, the Crouching Lion hike was the perfect substitution! It was also a hard hike but based on the pictures that I’ve seen – Crouching Lion had a much better viewpoint at the top. You don’t want to miss out on this amazing experience!
From the hours we have spent there, you can see all the different lighting that the sun can have on the island. It was definitely worth the 2.5 hours staying up at the top taking pictures.


Click here for other things to do during your trip to Hawaii.
